The Timing Web App
The Timing web app gives you access to your Timing data from anywhere, not just your Mac. You can use it to start and stop timers on the go, manage your team, integrate with other services, and much more.
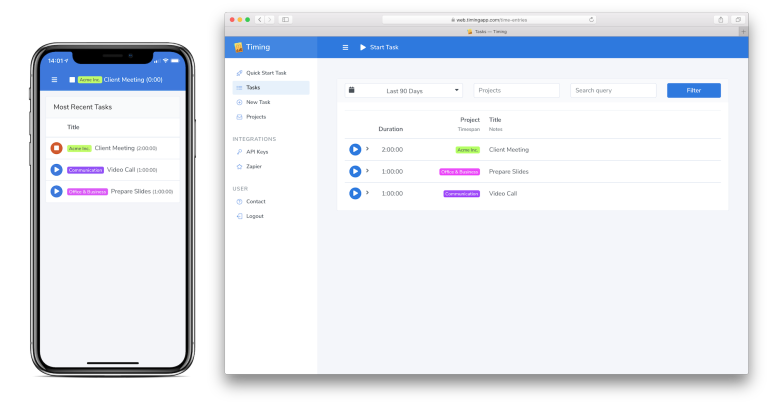
Table of Contents
Getting Started
To use the web app, a Timing Sync account is required. You can sign up for Timing Sync from within Timing for Mac by clicking this link. If you already have a sync account but can't remember your password, reset it here.
Once you have signed up for a sync account, open the URL web.timingapp.com in your browser to open the web app. Then sign in with your sync account's credentials. For enhanced security, you can also enable two-factor authentication (2FA) for your account on the 2FA settings page.
Install the Web App on Your Phone
You can install the Timing web app as a Progressive Web App (PWA) on your phone, adding it as an icon to your home screen and hiding the browser chrome from its interface. While not required, we strongly recommend this to make sure you have the web app handy whenever you need to quickly start a timer while on the go.
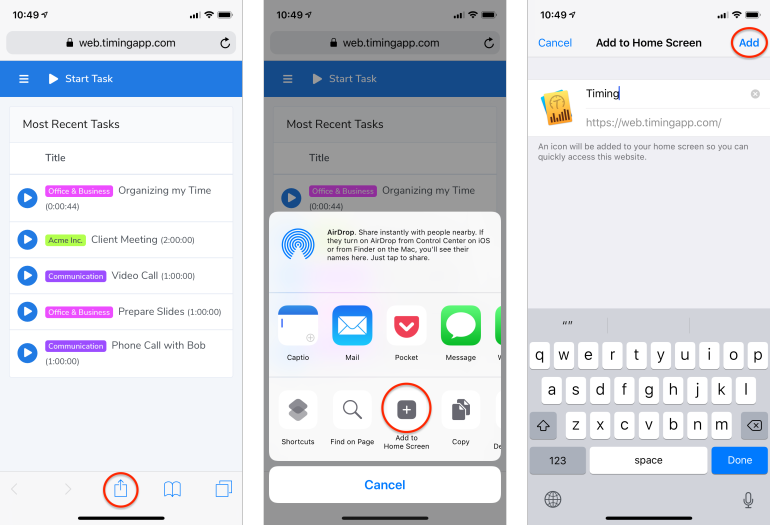
To install the Timing PWA:
- Tap the "Share" button in the Safari browser while using the Timing web app. Remember, you can access the web app by typing web.timingapp.com into the Safari browser's address bar on your phone. Note that this only works in Safari, not in third-party browsers.
- Tap the icon labeled "Add to Home Screen".
- Tap "Add" in the upper-right corner of the screen.
Start and Stop Timers on the Go
Let's face it, we need a time tracking app that works where you work.
Luckily, the Timing web app has you covered. It is a great way to record time for phone calls, on-site meetings, and even when you research work-related tasks on your iPhone or iPad.
There are two easy ways to start tracking your time from the web app:
- The "Dashboard" page has a section called "Quick Start Timer". This lets you quickly resume any of your recent timers.
- The "Start Timer" button in the title bar. This option is great when you are looking to start a new timer, one that you have not previously worked on.
Option 1: Use "Quick Start Timer" to Track Time for a Pre-Existing Time Entry
Are you looking for a way to quickly start where you left off? Then this option is for you!
The Quick Start page contains the 25 most recent timers you have worked on from the past 30 days — with the latest at the top of the list. This means you don't have to scroll forever trying to resume your last timer.
- Press the three-line "Hamburger" menu in the top left of the screen to show the navigation menu.
- Press "Dashboard". If you just logged into the web app, you will already be on this page.
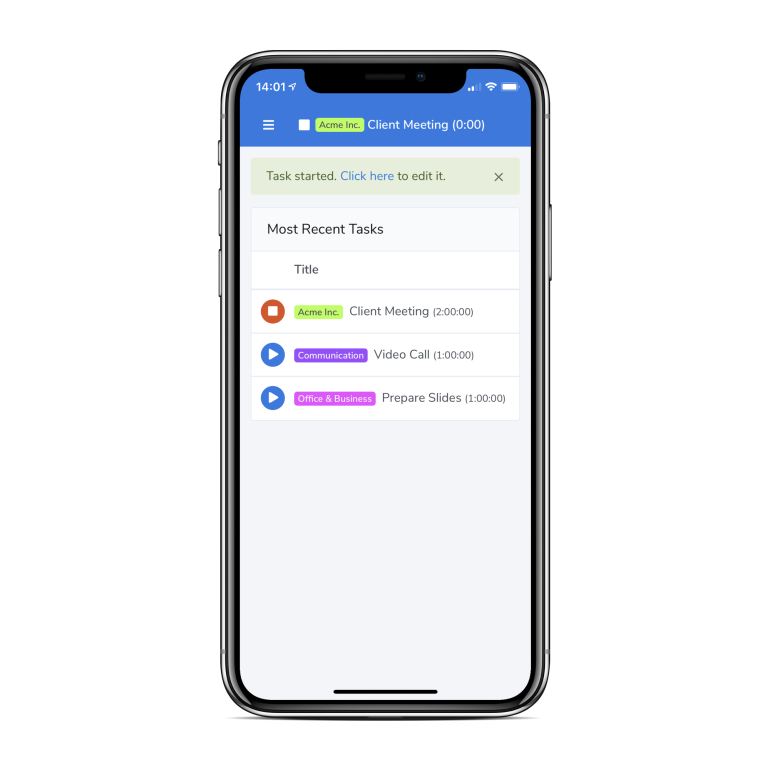
- Press the blue "Play" button next to the timer you would like to resume.

Voila! You will see a message that your time is now being tracked with a link to edit the timer — handy if you need to make some small tweaks to the timer's title. The started timer will be synced to your Mac within a few minutes, of course. By the way, don't forget to stop the timer once you are done! More on stopping timers below.
Option 2: Use "Start Timer" to Track Time for a New Time Entry
Starting timers via the "Start Timer" feature is great for when you have a new task that you want to quickly track time for. Unlike Quick Start, with this option, you can enter detailed information for your new entry.
- Click the "Start Timer" button in the title bar.
- Fill out the details of your time entry.
- Press the blue "Start" button.
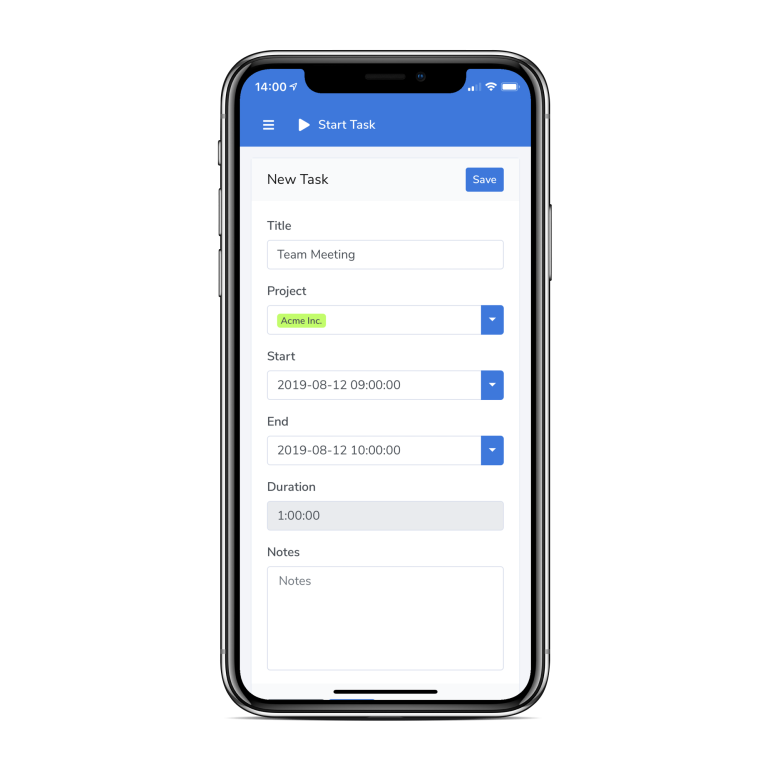
Note that the "Start Timer" dialog also lets you pick a different start time for your timer instead of "right now": Simply press the blue button next to the "Start" field, then press "15 Minutes Earlier". You can also set the timer's start time to the previous one's end time to avoid a gap in your time tracking.
Stop Timers
Whether you started a pre-existing or new timer, stopping a timer is just as easy as starting.
To make it easily accessible, there are two different ways to stop a timer in the Timing web app:
- Using the "Stop Timer" button in the title bar, or,
- Pressing the red "Stop" button on the "Quick Start Timer" list.
How you choose to stop a timer is a matter of personal preference — you can't go wrong with either option.
Other Use Cases
Manage Your Team
Timing's team functionality allows you to share projects with your team and view how much time your team members spent on each project. To get started, please refer to the Timing for Teams documentation.
Generate Reports
While Timing for Mac has built-in reporting functionality, you will need to use the web app to view your team members' time entries. To learn more, have a look at our knowledge base article on managing your team.
Connect to Other Apps and Services With the Zapier Integration
Zapier is a web service that lets you connect hundreds of other apps with one another. With our Zapier integration, you will be able to automatically send time entries to Google Sheets, import projects from your project management app of choice into Timing, and much more. For more information, please refer to the full documentation on the Zapier integration.
Access Your Time-Tracking Data via the Web API
If you are looking for more customization options for using your Timing data than what Zapier has to offer, our Web API could be an option for you. Please refer to the API documentation on the Timing web app to get started. We also provide API documentation in the "llms.txt" format optimized for AI code generation.
Let AI Manage Your Time via MCP
With a Timing Connect subscription, you can connect AI assistants like ChatGPT, Claude, and Codex to Timing via the Model Context Protocol (MCP). This lets you review your activities, manage projects, and more — all from within your AI conversation. For setup instructions, see the AI Integration via MCP documentation.
Easily Create New Projects
Another way to take advantage of the Timing web app is to create new projects on the fly. This means that you won't need to use the Timing desktop app when Jamie comes up with a new project idea on your call.
To create a new project from the web app:
Simply select "Projects" from the navigation menu. You'll get a full list of all your current projects. Make sure there isn't a duplicate project, then click the "New Project" button.
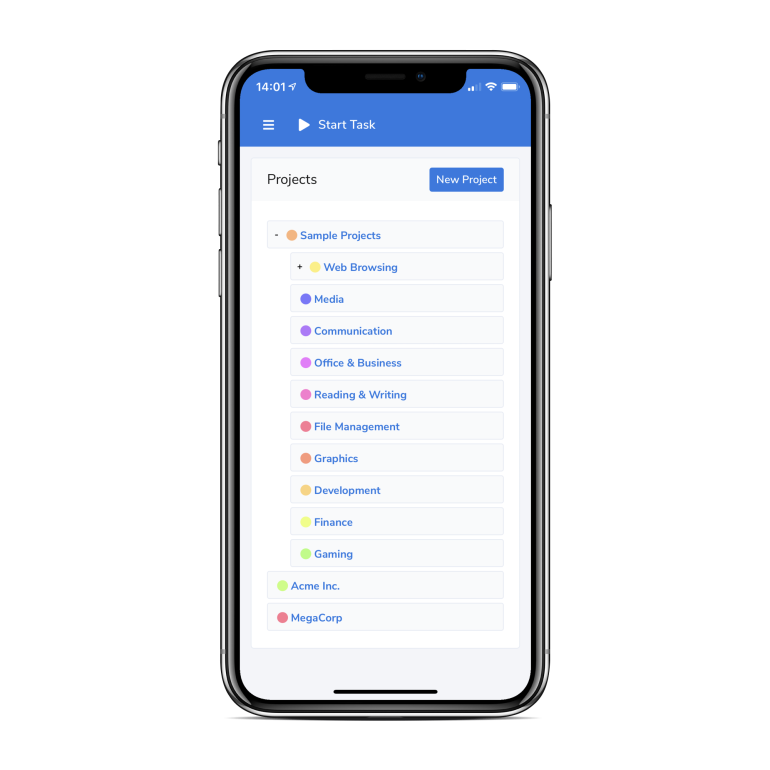
You'll have all the project options you need — you can even set a custom color and tweak the project's productivity rating.
Add Time Entries After The Fact
Were you interrupted and unable to start tracking your time? No worries! Just like how you started a timer before, you can use the "New Time Entry" navigation item to add a past time entry.
This is a great feature for adding those impromptu time like a meeting or phone call that you forgot to start a timer at the time they happened. This works just like starting a timer, except that you'll also need to provide an end time for the entry you are creating — it has already happened, after all.