How to Streamline Your Billing Process with Zapier and Timing
One of the most common questions we hear at Timing is: How can I bill my clients for the time I track with Timing?
Thanks to the Timing Web App and its Zapier integration, we now have a much better answer to this question. Our Zapier integration lets you send your times to hundreds of other billing and time tracking services, such as FreshBooks, Quickbooks, Toggl, and many more!
Zapier is a web service that lets you connect thousands of apps, sending data from one service to another. For example, you can use the Timing web app together with Zapier to automatically export tasks, create projects, and even post messages to Slack when you start a task. Zapier automatically processes your data in the background, so you can keep focusing on your work at all times. Simply set your “Zap” once and forget about it — no extra work on your end.
Read on for a step-by-step guide on using Zapier to send your Timing tasks to FreshBooks for invoicing. This process works just as well for a whole lot of other invoicing apps, of course! Plus, we’ll inspire you with several more ideas for integrating your Timing data with other apps.
Example Zap: Turn Timing Tasks into FreshBooks Time Entries for Invoicing Your Clients
To give you a better feeling for what it’s like to use Zapier with Timing, let’s go step-by-step through creating an example Zap that automatically adds the tasks you create in Timing as time entries to FreshBooks. In FreshBooks, you can then add these time entries as line items to your invoices. If you are not using FreshBooks, don’t worry — the same process also works for many other invoicing and time-tracking tools!
Note that this guide expects that you already have accounts for Zapier and FreshBooks. You will also need a license for Timing Connect — contact us to get a free Timing Connect trial.
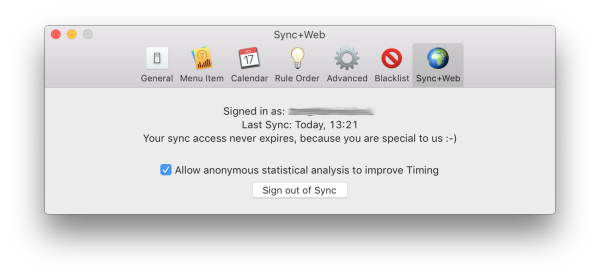
- The Timing Web app uses your Timing Sync data under the hood, so first make sure that you have a Timing Sync account. You can check your sync account’s email address (or create a new account) in the Timing preferences under “Sync+Web”:
- Click this link to add Timing to your Zapier account.
- In the Zapier UI, click “Make a Zap!”:

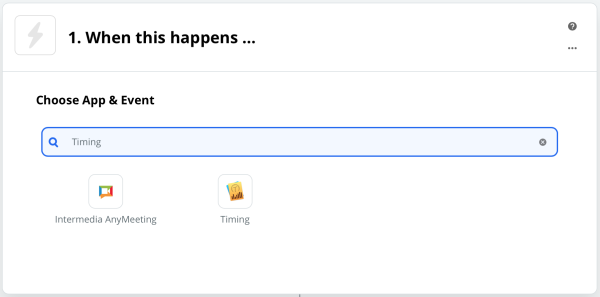
- Search for “Timing” in the “New Zap” dialog, then select “New Time Entry” (Tasks in Timing are called Time Entries in Zapier):
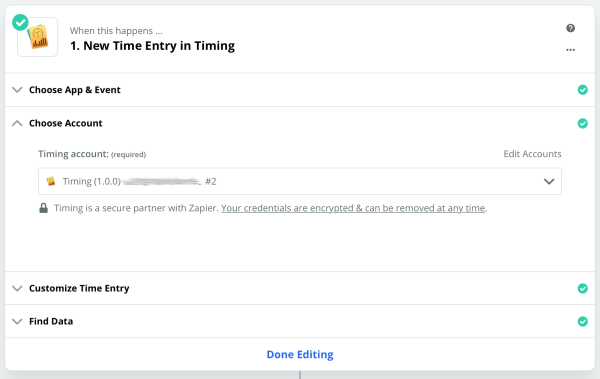
- In the next step, connect your Timing account. When you are prompted to log in to the Timing web app, use your Timing Sync credentials:
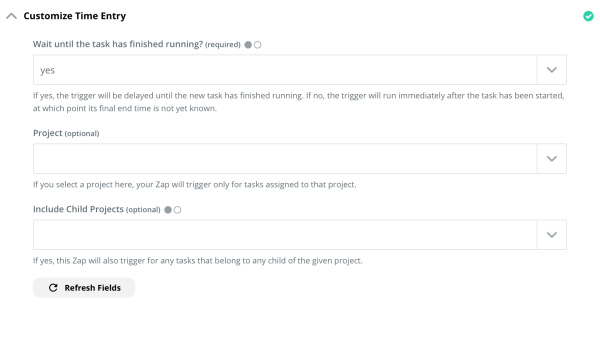
- Under “Customize Time Entry”, you can select which Timing tasks should be sent to FreshBooks. For example, you can choose to use only tasks from specific Timing projects. In any case, make sure that “Wait until the task has finished running?” is set to “yes”.
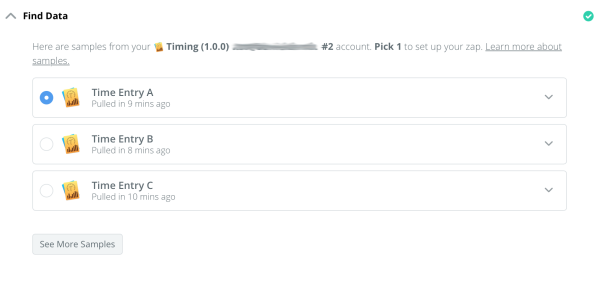
- Select one of your existing tasks to use as a sample for the rest of the Zap:
- Add a second step, choosing “FreshBooks New” as the app and “Create Time Entry” as the action event:

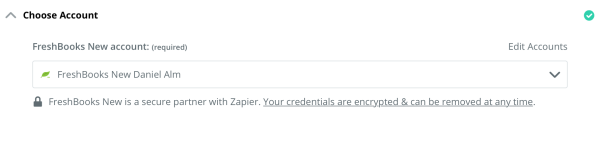
- Select or connect your FreshBooks account:
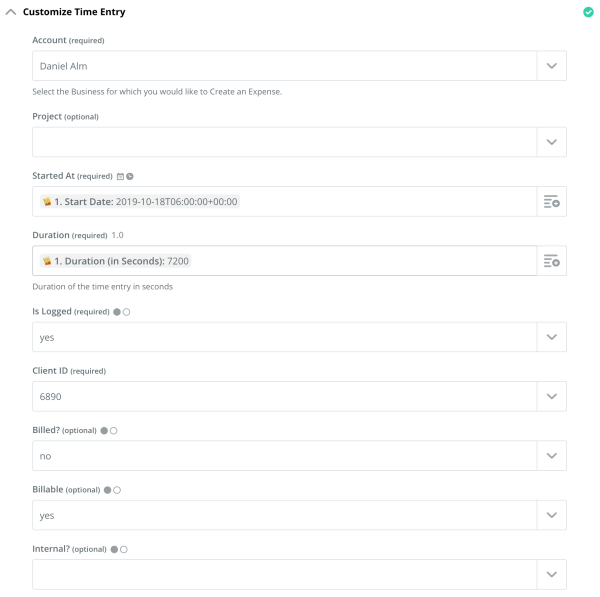
- Under “Customize Time Entry”, select the properties of your Timing task that you would like to send to FreshBooks. Make sure to fill in the “Started At”, “Duration” and “Note” fields as shown below. You will also need to select one of your clients to associate this time entry with.

- In the next step, you can have Zapier send a test time entry to FreshBooks:
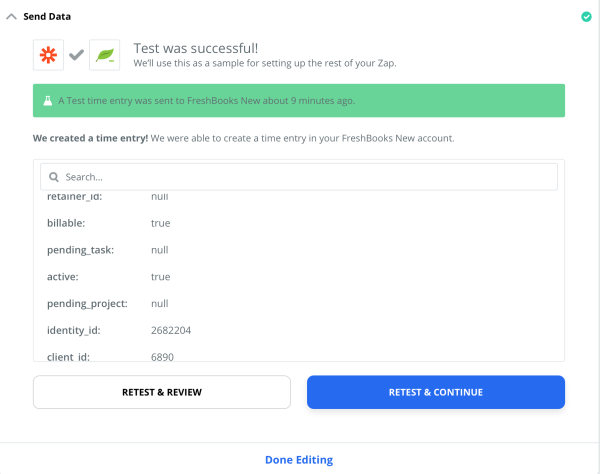
You can then go to your FreshBooks account and verify that the time entry has been created there: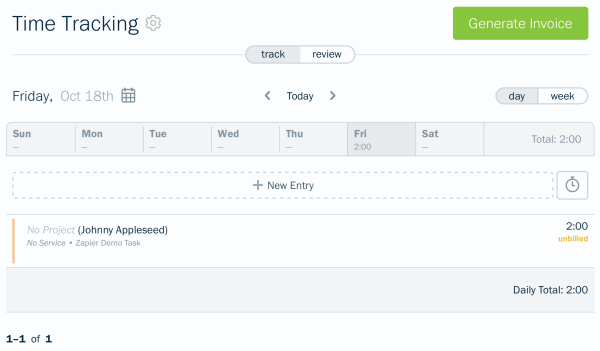
- At last, click “Done Editing” and make sure to turn on your Zap.
That’s it! From now on, Zapier should automatically check Timing for new tasks every 15 minutes and send those to FreshBooks. So, if your tasks aren’t appearing in FreshBooks right away, don’t worry — just check back in after half an hour.
This is just one of many examples for what you can do with Timing and Zapier. Read on for more examples!
Close the Loop: Mark Entries as “Billed” After Invoicing
Once your Timing time entries are flowing into FreshBooks (or whichever invoicing tool you use), there’s one more step worth building into your workflow: updating the Billing Status on those entries in Timing itself. The Billing Status field lets you tag each time entry as Not Billable, Billable, Billed, or Paid — so you always know exactly which hours still need to be invoiced, and which invoices you’re still waiting on payment for.
The typical workflow looks like this:
- Set a default status per project in Timing (for example, client projects default to “Billable,” internal projects to “Not Billable”) via the project editor. New time entries will pick up the correct status automatically.
- When invoicing day arrives, filter for entries still marked “Billable” in Timing, let Zapier push them through to FreshBooks, and create your invoice.
- Back in Timing, select the invoiced entries in any activity list, right-click, and choose Set Billing Status → Billed to update them in bulk.
- When the client pays, update those same entries to Paid the same way.
That way you’ll never bill the same hours twice, and you always have a clear view of which invoices are still outstanding.
Zapier & Timing — More Integration Examples
Connect with Other Time Tracking Software
How frustrating is it when each of your clients has a different system they want you to track your time in? It can be difficult to work your best when you are constantly trying to remember which client wants you to track your time where. It’s also a huge interruption that makes you less focused and productive.
We have the perfect solution to make your clients happy while saving you the headache of logging in and out of different time tracking apps. Simply track all your time in Timing and have it export to the other apps, like Toggl. This way, your time is managed in one system and your clients get the time tracking details from their preferred app.
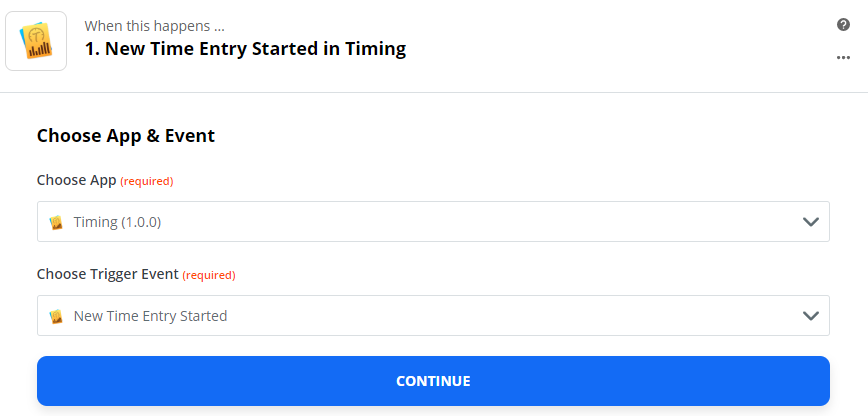
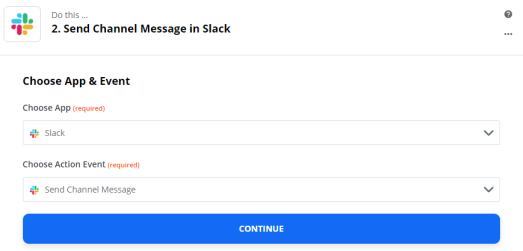
Post a Message to Slack Whenever You Start a Task
With this Zap, you can easily keep up good communication. You won’t have to worry about forgetting to tell someone about what you are working on. Simply post a message to Slack whenever you start a task — without having to lift a finger.
- Connect a “New Time Entry Started” Timing trigger.
2. Connect Slack with the “Send Channel Message” action.
We’re Here to Support You
Our goal is to consistently provide you with new ways to use Timing. With the Timing Web App and the many different Zapier integrations, you now have hundreds of new ways to use and update your Timing data.
If you’d like to see a full list of our available triggers and actions, you can find the full list in our documentation.