Timing for Teams: Using Timing as a Team Member
Chances are that you are reading this page because you received an invitation to join a Timing Team.
Don't worry, using Timing as a team member is easy!
In this article, you will learn just that — using Timing effectively as a team member.
Table of Contents
Your Boss Won't See Your Private Information
Your manager will never be able to see which apps, documents and websites you used!
That information is private to you and only you.
Instead, Timing only shows the total time you spent on your Mac on a given team project to your manager.
In addition, any times assigned to your private projects are never visible to your manager.
Your manager can only see the times you assign to one of your team's projects. This lets you still keep tracking
time for private activities while sharing only work-related times with your boss.
Getting Started
Here's a quick 30-second summary:
- Make sure Timing is installed and that you are signed into sync.
- Accept the team invitation and wait a few minutes for team projects to show up in Timing for Mac.
- Assign app usage to team projects as you would with private projects.
What Is This About?
Timing is an automatic time tracker for your Mac. You can work as usual, while Timing records how much time you spend on each app, document, and website. When it is time to fill out timesheets for your boss, Timing presents the time it tracked for you in a timeline, so that you quickly see when you worked on what. This means that filling out timesheets will be much faster and easier with Timing than it used to be!
To learn more about how to fill out timesheets with Timing, have a look at
the corresponding knowledge base article.
You can also sign up for our free email course to learn about how you can
use Timing effectively.
Installing Timing
If you haven't already, make sure to download and install Timing on your Mac.
There's just one more requirement for joining a team: we'll need to make sure that you have a Timing Sync account.
Once you have installed Timing, click here to open the sync preferences,
letting you sign up for a sync account if you haven't already.
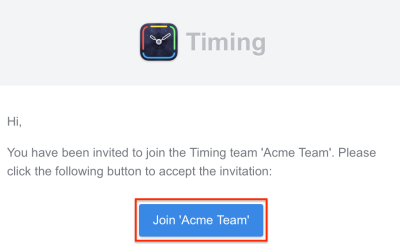
With that out of the way, it's time to join the team. Click the "Join '(Team)'" button in the
"You have been invited to join the team '(Team)'." email you received:
 If you get prompted to log in, use the credentials of your new Timing Sync account created above.
Congratulations! You are now a proud member of your team in Timing!
Working in Your Team
In general, Timing works almost identically whether you use it in private or in a team context. That means that our email course will teach you how to use Timing effectively; give it a try, it's free!
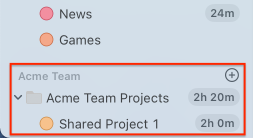
Within a few minutes of joining the team, your team's projects will show up in the sidebar:
 You can also create new projects inside the team as needed.
To assign time to these projects, drag and drop your times onto team projects as you would with your private projects; you can even create rules for these projects. Note that rules for team projects are shared with all other team members by default; contact us if you'd prefer for each team member to have their own project rules.
Conclusion
That's it, you are all set! Just make sure to diligently log your times, and you will be able to quickly record your time while keeping your boss happy.
And should you have any questions about Timing, do not hesitate to reach out, we are happy to help!