The Activities Screen
The Activities screen is at the heart of your Timing workflow. It is both where you find out
what you have done as well as categorize your time into projects.
While the basics of this screen are fairly straightforward to use, this article will teach you all of the advanced
ways in which this screen can make your time tracking both faster and more accurate.
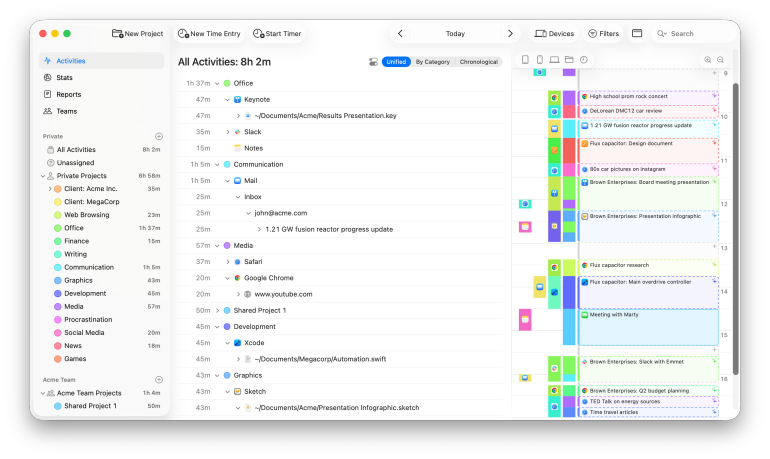
Table of Contents
Video Tutorial: Using the Activities Screen to Assign App Usage and Create Time Entries
The Timeline
At the top of the screen is the timeline. It gives you a visual overview of your entire day, showing when you worked, which apps you used, and which projects you worked on. And if you have set up Timing's calendar integration, Timing will also pull in the events from your calendar, letting you quickly record "offline time" as well.
The timeline also tells you what exactly you have been doing at any given time; when you hover it with your mouse cursor, it will overlay the exact website or document you used at that time. Similarly, click and drag on the timeline to select a time range; you'll then only see the activities that occurred during that time.
In addition, you can click the little '+' buttons on the timeline to quickly create time entries that assign whole blocks of time to a single project. That way, you can assign a whole day's worth of work with just a few clicks. This can save you a lot of time while giving you full control over how your time is tracked.
If you'd like to learn more about this feature, please have a look at our dedicated article on time entries.
The Activity List
Below the timeline is the activity list. It lists all the projects that you have spent time on, ordered descending by how much time you spent on each. You can click the triangles next to each item to expand it, revealing additional information, such as the individual apps, documents and websites you have been working on as part of that project.
Like the timeline, the activity list also helps you categorize your time: simply drag entries from it onto a project in the sidebar to assign them to that project.
Advanced Settings
The activity list provides several options to adapt its contents to your needs:

Here's what each of these options does:
-
Group by project.
When you uncheck this option, the activity list will only show a long list with the activities from all your projects lumped together, without grouping them by project first.
(You can still select individual projects in the sidebar to only show activities from those projects.) -
Group by device.
Enabling this option will group all activities from a single device together, so that you can see how much time you spent on each device, and drill down into how you spent your time on an individual device. This also lets you easily collapse devices that you are not as interested in, but you might also want to consider our option to filter out specific devices altogether for that.
This option is particularly useful in conjunction with our Screen Time integration, to help distinguish between your Mac and iOS devices. -
Group websites independently of their browser.
By default, Timing groups any websites you visited under the browser you used to open them; checking this option instead "moves them up a level", giving individual websites the same priority as regular apps. This is useful when you spend most of your time in the browser anyway, and want to give websites the same prominence as apps. -
Group file paths independently of their app.
This option is similar to the above one, but for file paths. If you spend a lot of time in the same folder, but across many apps, (e.g. because that folder contains all files related to a particular client), this option lets you view all these times together rather than spread out across many apps. -
Group file paths by.
This lets you choose among three different options:- Immediate parent directory. Groups each file by the directory it is contained in, but not by that directory's parent directories.
- All directories (default). Also creates groups for the directory containing the file's parent directory, and so on.
- File path only. Does not create any groups for parent directory; instead, each file is listed separately, regardless of which directory it is contained in.
-
Include time entries.
If you check this option, Timing will show only your app usage, but not any time entries that this app usage might belong to. This is useful if you would like to see how you spent time on your Mac, regardless of any time entries that you might have created to assign these times manually. -
Include app usage date ranges.
Adds small sub-groups below each entry, detailing at which times of the day exactly you performed any given activity. Most people do not need this level of detail, so this option is unchecked by default. -
Create entries for titles in addition to paths.
When an activity has both a path and a window title, unchecking this option will show only the path but not the title. This can be useful to reduce clutter in the activity list.
Alternative Modes
Next to the button that invokes the activity list's advanced settings, you have the option to select two alternative modes, By Category and Chronological.
The By Category mode replaces the unified activity list with four different cards, grouping your time according to different criteria:
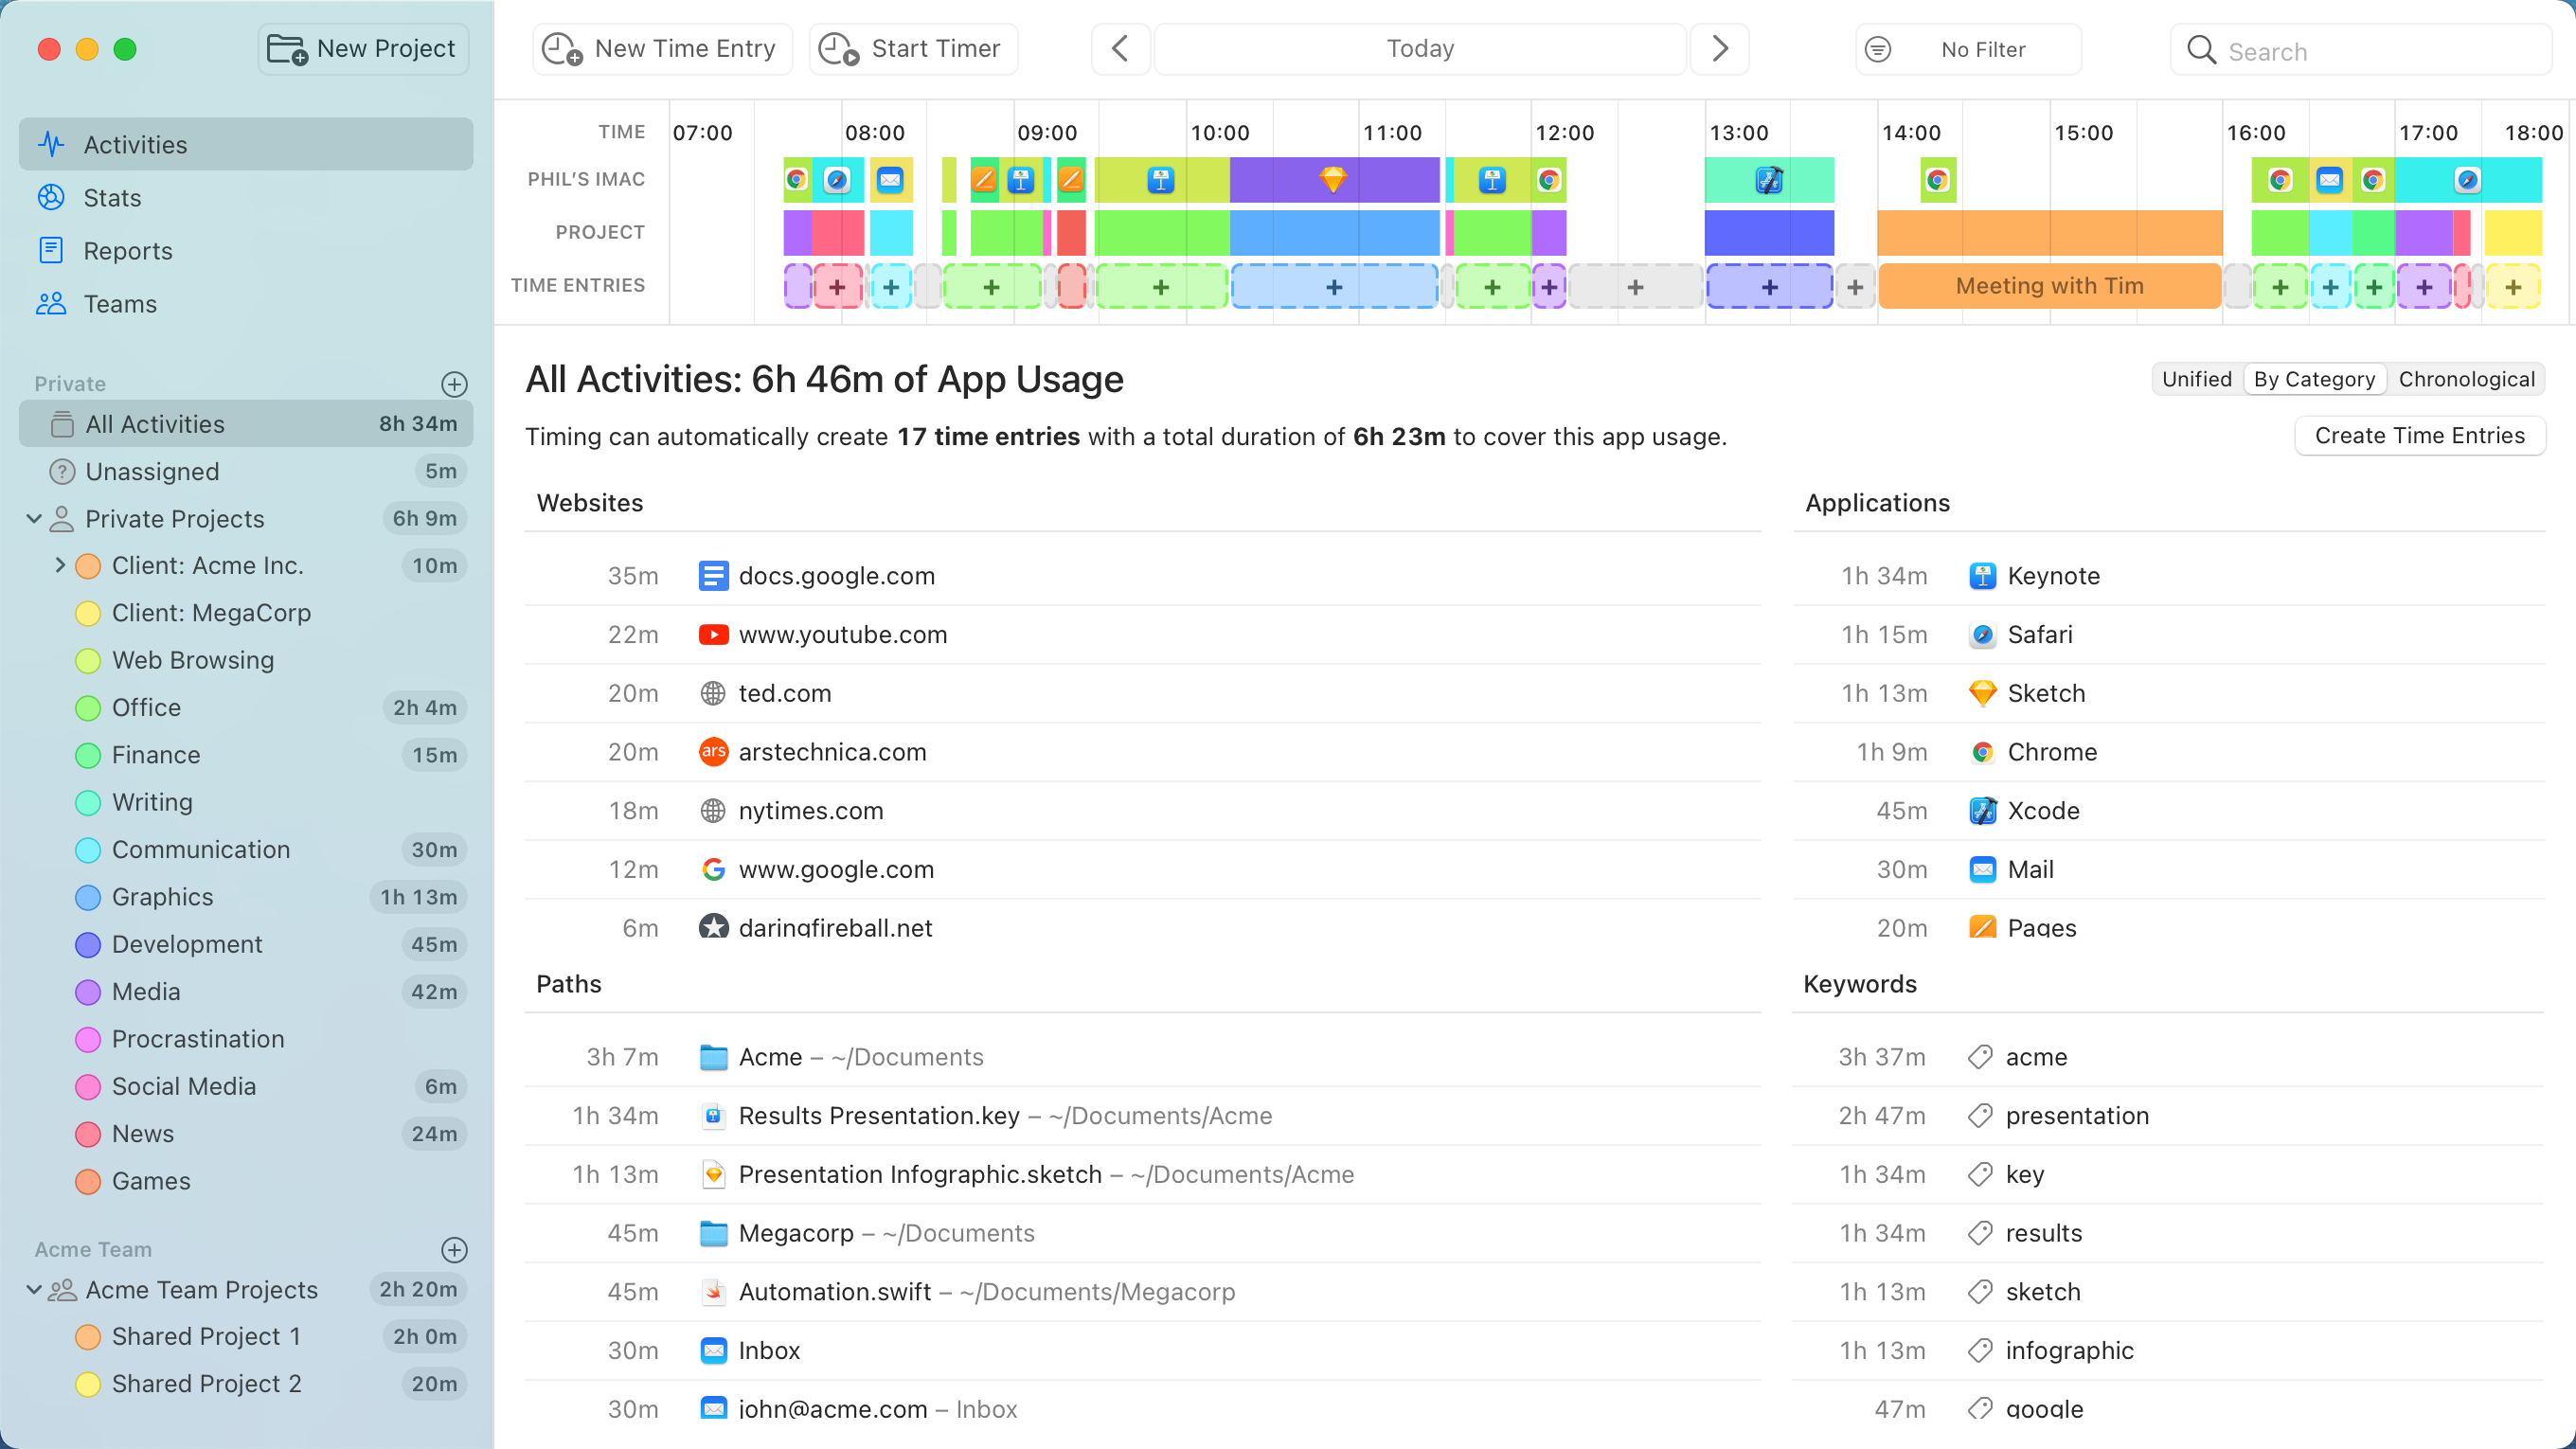
- Websites. This card contains the domains of all the websites you visited.
Helpful when you use a particular website for a specific project. - Applications. Lists how much time you spent in each of your apps.
- Paths. From all the paths it tracks, Timing tries to extract the folder they are in.
Often, specific folders are related to distinct projects, and if you drag the whole folder from this card onto a project, all the files inside that folder will be assigned as well.
Note that this can contain any kind of folders — those for files but also, say, mailboxes. - Keywords. Timing automatically extracts common words from the window titles and paths it tracks.
This is useful if the things you worked on for a particular project contain common words (e.g. the project's name).
By the way, if you are familiar with older versions of Timing, what used to be available as the "Review" screen is now available as this "By Category" mode.
The Chronological mode orders all your activities by when exactly you performed them. This can be useful when you would like to see exactly when on your day you did what, but you might often be better served by hovering your mouse cursor over the timeline instead.
Filtering out Devices
By default, Timing will show you the activities it has tracked for all of your devices, including the iPhone and iPad usage imported from Screen Time. However, especially your mobile device usage might distort your reports, resulting in more unassigned time and a lower productivity score than expected.
To avoid this, simply click the "Devices" button in the toolbar, then deselect the devices you are not interested in (e.g. "All iOS devices"):
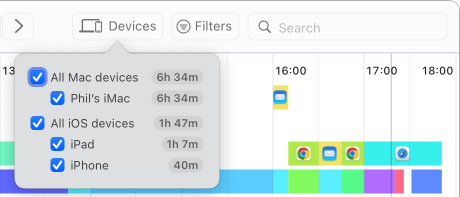
Once that is done, Timing will continue to track your time on these devices, but you'll be able to view all your statistics for only the devices you are interested in.
Note that Timing remembers this selection across restarts, but you can of course re-select devices at any time.
And if you'd like to exclude your mobile device usage from the time displayed in the status bar as well as from your daily time summary notifications, there's an option for that, too.